
240sx manual swap
The 240SX manual swap is a popular trend among enthusiasts, enhancing driving experience. Key parts include transmission, clutch, and ECU modifications. Community support and detailed guides simplify the process.
1.1 Overview of the 240SX Platform
The Nissan 240SX, spanning S13 and S14 generations, is renowned for its balanced chassis and rear-wheel-drive layout, making it a favorite for tuning. Equipped with the KA24DE or SR20DET engine, its potential for modification is vast. The platform’s popularity stems from its affordability, reliability, and versatility, allowing enthusiasts to transform it into a high-performance vehicle. With a strong aftermarket support, the 240SX is ideal for manual swaps, offering improved control and driver engagement. Many owners opt for manual transmissions to unlock its full potential, especially when paired with engine upgrades like the SR20DET.
1.2 Why a Manual Swap is Popular
The 240SX manual swap is popular for enhancing performance and driver engagement. It offers better control over the car and is typically more cost-effective than automatics. The driving experience becomes more engaging due to manual shifting, which appeals to enthusiasts. Additionally, the strong community support and availability of resources make the swap more accessible. The desire for a more connected driving experience and potential improvements in fuel efficiency also contribute to its popularity among 240SX owners.
1.3 Benefits of Converting to a Manual Transmission
Converting to a manual transmission offers improved performance and control. Drivers experience better acceleration and fuel efficiency, while lower maintenance costs enhance long-term savings. The manual swap also heightens driving engagement, providing a more immersive experience. Additionally, the car’s value may increase, appealing to enthusiasts. The availability of parts and community support further simplify the process, making it a practical upgrade for 240SX enthusiasts seeking enhanced performance and driving satisfaction.

Understanding the Importance of the Swap
Converting to a manual transmission enhances driving experience, offering better control and engagement. It also boosts performance and reduces long-term maintenance costs, making it a valuable upgrade for enthusiasts.
2.1 Performance Gains with a Manual Transmission
A manual transmission swap significantly enhances the 240SX’s performance by improving acceleration and responsiveness. Drivers gain precise control over gear shifts, optimizing power delivery. The manual setup handles higher torque outputs, especially beneficial for modified engines. Additionally, manual transmissions eliminate the lag associated with automatic torque converters, allowing quicker acceleration and sharper throttle response. This makes the car more engaging for spirited driving and improves lap times in racing scenarios. The direct connection between the driver and the vehicle enhances the overall driving experience, making it a preferred choice for enthusiasts seeking improved performance and connectivity to their car.
2.2 Cost-Effectiveness of a Manual Swap
A manual transmission swap for the 240SX can be cost-effective, especially for enthusiasts seeking enhanced driving control and fuel efficiency. The initial investment includes purchasing a manual transmission, clutch kit, flywheel, and other components, with costs ranging from $1,500 to $4,000, depending on parts condition and labor. However, manuals generally offer lower maintenance costs and better fuel economy, offsetting initial expenses over time. Additionally, the resale value of a manual-equipped 240SX often increases, making the swap a financially savvy choice for driving purists.
2.3 Community Support and Resources
The 240SX manual swap benefits from a strong community and extensive resources. Online forums, guides, and tutorials provide detailed instructions, reducing confusion. Enthusiasts share experiences, troubleshooting tips, and part recommendations, ensuring accessibility. Websites like NicoClub offer comprehensive swap guides, while retailers like Enjuku supply necessary components. Active forums and social media groups further enhance support, making the process less daunting. This collective knowledge base is invaluable for both novices and experienced builders, fostering confidence and success in achieving a smooth manual transmission conversion.

Planning and Preparation
Planning involves gathering essential parts, tools, and budgeting. Researching transmission options and compatibility ensures a smooth swap. Preparation includes organizing workspace and consulting guides for success.
3.1 Essential Parts Needed for the Swap
The manual swap requires a 5-speed transmission, clutch kit, flywheel, and driveshaft. Additional components include a transmission mount, crossmember, and hydraulic clutch line. An S14 manual ECU and speed sensor are crucial for compatibility. Ensuring all parts are sourced from compatible models, such as the S13 or S14, guarantees a seamless installation. Proper tools like a 10mm bolt and wiring harness modifications are also necessary. Budgeting for these parts and tools is essential to avoid delays during the process.
3.2 Tools and Equipment Required
A manual swap demands a variety of tools, including wrenches, screwdrivers, and a jack with stands. A transmission jack and bearing puller are essential for handling the gearbox. Punches and drifts may be needed for specific bolts. Additionally, a torque wrench ensures proper tightening of critical components. Basic tools like pliers and sockets are indispensable. Specialized equipment, such as a clutch alignment tool, can simplify the installation. Having a well-stocked toolbox is crucial for a smooth and efficient swap process, minimizing delays and potential pitfalls.
3.3 Budgeting for the Manual Swap
Budgeting for a 240SX manual swap requires careful planning. Costs include the transmission, clutch kit, driveshaft, and ECU modifications. Prices vary based on whether parts are new or used. A used transmission can range from $500 to $1,500, while a new one may exceed $3,000; The clutch kit and flywheel typically cost between $300 and $600. Wiring harness modifications and labor fees add to the total. Tools and miscellaneous parts, like adapters, can increase expenses. Setting a realistic budget of $2,000 to $4,000 is advisable, depending on the swap’s complexity and your DIY involvement.

Choosing the Right Transmission
Selecting the right transmission for a 240SX manual swap involves popular options like the S13 and S14 5-speed, ensuring compatibility with your engine and drivetrain setup.
4.1 Popular Transmission Options for the 240SX
The 240SX manual swap often utilizes the S13 and S14 5-speed transmissions due to their compatibility and robustness. These transmissions are well-suited for the KA24DE engine, offering smooth gear shifts and reliable performance. The S14 transmission is particularly favored for its strength and slightly better gearing ratios, making it ideal for both street driving and mild racing applications. Additionally, aftermarket support for these transmissions is extensive, ensuring accessibility to parts and modifications. Their popularity within the 240SX community also means abundant resources and guides are available for installation and tuning.
4.2 Compatibility with the KA24DE Engine
The KA24DE engine in the 240SX pairs well with manual transmissions like the S13 and S14 5-speed, offering a seamless integration. These transmissions are bolt-in compatible, simplifying the swap process. The KA24DE’s strength and torque output make it an ideal candidate for a manual setup, enhancing both performance and drivability. The S14 transmission is particularly favored for its durability and slightly improved gearing, making it suitable for both daily driving and mild performance upgrades. Adapter plates and crossmembers are often required to ensure proper alignment and fitment. This compatibility ensures enthusiasts can achieve a reliable and efficient manual swap.
4.3 Considerations for SR20DET Swaps
When pairing an SR20DET engine with a manual transmission in a 240SX, compatibility and integration are crucial. The SR20DET’s turbocharged performance requires a robust transmission, such as the S15 or R154, to handle increased torque. Adapter plates and custom mounts may be necessary for proper fitment. Additionally, the ECU and wiring harness must be updated to support the SR20DET’s fuel injection and boost control systems. This ensures seamless operation and optimal performance post-swap, making it a popular choice for enthusiasts seeking enhanced power and drivability in their 240SX builds.

ECU and Wiring Harness
Selecting the right ECU and modifying the wiring harness are critical for a smooth manual swap. Proper tuning ensures optimal performance and compatibility with the new transmission.
5.1 Selecting the Right ECU for Manual Swap
Selecting the appropriate ECU is vital for a successful manual swap. Ensure compatibility with your engine, such as the KA24DE or SR20DET. An aftermarket ECU like AEM or Haltech offers advanced tuning capabilities. Some setups may require a standalone ECU, while others can reuse the stock ECU with modifications. Verify that the ECU supports manual transmission protocols. Proper tuning post-installation ensures smooth operation and optimal performance. Always consult community resources or experts for ECU recommendations tailored to your specific swap configuration.
5.2 Wiring Harness Modifications
Wiring harness modifications are essential for a manual swap to ensure proper communication between components. Key modifications include re-routing the reverse light switch wiring and integrating the clutch pedal position sensor. The neutral safety switch must be repurposed or bypassed. Ensure the transmission range sensor is correctly wired to the ECU. Additional connectors may be needed for manual-specific functions, such as the clutch start switch. Use a soldering iron and heat shrink for reliable connections. Always reference a trusted guide or wiring diagram specific to your 240SX model to avoid errors during the process.
5.3 Tuning and Calibration Post-Swap
Post-swap tuning involves configuring the ECU to recognize the manual transmission. Key adjustments include recalibrating fuel injection, ignition timing, and clutch engagement points. Ensure the ECU is flashed with manual-specific software. Test drive to verify smooth shifting and acceleration. Fine-tune parameters as needed for optimal performance. Consulting a tuner or experienced technician is recommended for precise calibration. Proper tuning ensures reliability and maximizes the benefits of the manual swap, delivering a seamless driving experience.

Mechanical Installation Steps
Remove the automatic transmission, install the manual unit, and align the driveshaft. Ensure proper adapter installation and secure all bolts. Verify transmission mounts and crossmember fitment.
6.1 Removing the Automatic Transmission
Removing the automatic transmission is a critical step in the manual swap process. Start by draining the transmission fluid and disconnecting the battery. Next, disconnect the electrical connectors and coolant lines attached to the transmission. Remove the torque converter bolts and carefully pull the transmission away from the engine. Use a transmission jack for stability and support. Disconnect the driveshaft and any remaining components connected to the automatic unit. Ensure all brackets and mounts are removed or adjusted to accommodate the manual transmission. Properly label and store all hardware for reuse or disposal. This step requires patience and careful planning to avoid damage or complications.
6.2 Installing the Manual Transmission
Installing the manual transmission requires precision and care. Begin by aligning the input shaft with the pilot bearing and gently sliding the transmission into place. Ensure the transmission is properly seated and secured using the provided bolts. Reconnect the driveshaft, clutch hydraulic line, and wiring harness. Use a transmission jack to stabilize the unit during installation. Double-check all connections and ensure the transmission mounts are securely fastened. Properly torque all bolts according to specifications. Finally, test the clutch pedal operation and gear engagement to confirm everything functions smoothly before proceeding with other components.
6.3 Driveshaft and Adapter Considerations
When performing a manual swap, the driveshaft and adapter plate are critical components. Ensure the driveshaft is compatible with the manual transmission and engine combination. For KA24DE engine swaps, a custom driveshaft or an adapter plate may be required to mate the transmission properly. Use an S14 manual speed sensor for accurate gear ratio readings. Proper alignment and balancing of the driveshaft are essential to avoid vibrations. Additionally, verify that the adapter plate is correctly fitted to prevent any mechanical issues. Always consult a professional if modifications are needed for proper fitment and functionality.

Clutch and Flywheel
Choosing the right clutch kit ensures smooth power delivery. A lightweight flywheel improves acceleration. Pairing them correctly with the manual transmission enhances performance and drivability for optimal results.
7.1 Choosing the Right Clutch Kit
Selecting the ideal clutch kit for your 240SX manual swap involves considering your driving style and performance goals. A stock replacement clutch offers reliability for daily driving, while a performance clutch with a rigid hub and high-friction materials suits spirited driving. Lightweight options reduce rotational mass, enhancing acceleration; Ensure compatibility with your flywheel and transmission for seamless operation. Upgrading to a ceramic or Kevlar clutch improves heat resistance and durability, making it suitable for track use or high-performance applications. Always pair with the correct flywheel for optimal performance and longevity.
7.2 Flywheel Options and Installation
Choosing the right flywheel is crucial for your 240SX manual swap. Lightweight options reduce rotational mass, improving acceleration, while dual-mass flywheels offer smoother engagement. Ensure compatibility with your clutch kit for optimal performance. Installation requires resurfacing or replacing the flywheel to prevent glazing and ensure proper clutch engagement. Remove the old flywheel, inspect for damage, and install the new one with a pilot bearing if needed. Proper alignment and torque specifications are essential to avoid damage. Always use a dial indicator to check for warping before final installation. This ensures smooth operation and prevents future issues.

Pedals and Hydraulic System
Upgrading to manual pedals and a hydraulic clutch system enhances control. Install a clutch master cylinder and slave cylinder for smooth engagement. Ensure compatibility and proper bleeding for optimal performance.
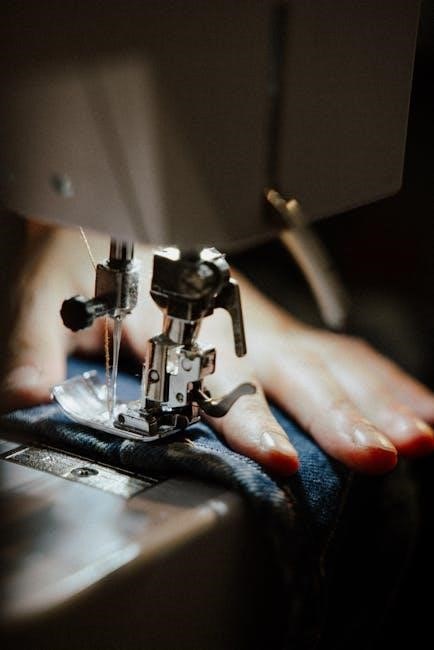
8.1 Installing Manual Pedals
Installing manual pedals is a crucial step in the swap. Remove the automatic pedal assembly and replace it with a manual pedal setup. Ensure proper alignment and secure mounting. Connect the clutch master cylinder to the pedal assembly. Bleed the hydraulic system to eliminate air bubbles. Test the pedal feel and ensure smooth operation. This step requires precision to maintain proper clutch engagement and driver control. Use compatible components to avoid compatibility issues. Follow detailed guides or consult experts for a seamless installation process.
8.2 Hydraulic Clutch Line Setup
Setting up the hydraulic clutch line involves installing a clutch master cylinder and a slave cylinder. Mount the master cylinder securely under the hood, near the brake master cylinder for accessibility. Attach the slave cylinder to the transmission bellhousing, ensuring it is properly aligned and secured. Route the clutch line carefully, using clips or brackets to prevent damage from moving parts or heat sources. Avoid kinks or restrictions in the line to maintain smooth clutch operation. After installation, bleed the system using a specialized kit to remove any air bubbles, ensuring a firm and responsive clutch pedal. Use the correct type of fluid, similar to brake fluid, to maintain hydraulic integrity. Consider adding a clutch reservoir or fluid level sensor if necessary, and ensure all components are compatible. Test the clutch pedal for smooth engagement and disengagement, adjusting as needed for optimal performance.

Transmission Mounts and Crossmember
Upgrading transmission mounts and installing a custom crossmember ensure proper alignment and stability. Polyurethane mounts improve durability, while a fabricated crossmember provides a precise fit. Ensure alignment accuracy to prevent drivetrain vibrations and damage.
9.1 Upgrading Transmission Mounts
Upgrading transmission mounts is essential for a manual swap. Polyurethane mounts are recommended as they offer better durability and resistance to torque. Installation requires raising the vehicle and accessing the mounts, typically without removing the transmission. Proper alignment is crucial to prevent drivetrain vibrations. Using a specific alignment tool or method ensures accuracy; Researching the best polyurethane mounts for your setup is important, with recommendations often available from enthusiasts or specific brands. Following a detailed guide or video can help ensure a correct and safe installation, avoiding potential damage and ensuring reliability.
9.2 Fabricating or Purchasing a Crossmember
Fabricating or purchasing a crossmember is crucial for a manual swap. A custom crossmember offers precise fitment for your transmission, while pre-made options save time. Steel is the preferred material for its durability. Ensure proper alignment with the chassis and drivetrain components. Bolt-on crossmembers are popular for ease of installation. Measure carefully to avoid interference with exhaust or suspension. Consulting forums or experienced builders can provide valuable insights. Choose based on skill level and budget for a reliable setup.
Post-Installation Testing
A thorough test drive is essential to ensure smooth operation. Check for leaks, unusual noises, or performance issues. Monitor transmission engagement and overall drivetrain functionality carefully.
10.1 Initial Test Drive Checklist
Begin with a slow, controlled drive to assess clutch engagement and pedal feel. Check for smooth shifting between gears and proper synchro operation. Monitor for any unusual noises or vibrations. Ensure the transmission is leaking-free and all connections are secure. Test acceleration from a standstill and in-gear pulls to verify performance consistency. Pay attention to any hesitation or slipping; Finally, drive in various conditions to ensure reliability and seamless operation of the manual setup.
10.2 Troubleshooting Common Issues
Common issues after a manual swap include difficulty engaging gears, clutch slippage, or transmission leaks. Check the clutch pedal adjustment and ensure proper hydraulic line pressure. Grinding gears may indicate worn synchros or misaligned components. Inspect the transmission mounts for stability and verify driveshaft alignment. Address any leaks by rechecking gasket seals and connections. If issues persist, consult troubleshooting guides or forums for specific solutions tailored to your setup. Early detection and correction prevent further damage and ensure smooth operation.